The Redmi 12 series is one of the most affordable smartphones with a triple camera setup. The rear camera consists of a 50MP main lens, an 8MP ultrawide, and a 2MP macro sensor. The front camera, on the other hand, has a resolution of 8MP.
The camera app is easy to use and offers different modes such as Portrait, HDR, and Night Mode to optimize the Redmi 12 phone’s camera. Photos taken with the phone’s camera in good lighting conditions are clear and detailed.
However, the images lack detail and the HDR mode falls short of expectations, failing to differentiate between regular and HDR photos. The blurring effect is somewhat imprecise in detecting the edges of the subject.
While the 8MP front camera captures good selfies in auto mode, the Redmi 12’s camera has the same Beauty mode as other Xiaomi and Poco phones, which means smoothing the skin for a more attractive appearance, sometimes to excess.
Download Gcam Port Redmi 12
Table of Contents
Redmi 12 and Redmi 12c users can use one of the two versions of Google Camera Port shared here. You can choose between Gcam BSG or Gcam LMC (recommended).
GCAM BigKaka 8.4.300
| Modder | BigKaka |
| Ukuran |
144MB |
| Download | AGC_8.4.300_V9.apk |
GCAM LMC 8.4 Redmi 12
| Modder | Hasli |
| File Size | 132MB |
| Download | Gcam LMC 8.4.apk |
GCAM BSG 8.1 Redmi 12
| Modder | BSG |
| File Size | 74MB |
| Download | MGC 8.1.101 A9 GV1zfix |
GCAM Urnyx Redmi 12
| Modder | Urnyx05 |
| File Size | 58MB |
| Download | GCam_7.3.018_Urnyx05-v2.6 |
How to Install Gcam on Redmi 12
Now we will show you on how to install Gcam apk on Xiaomi Redmi Note 12:
- In the first step, launch the Xiaomi File Manager app.
- And after that, in the category section, select APK.
- Next, locate and click the Gcam APK file you just downloaded.
- If unknown app installation permissions appear, tap Settings, then enable Allow from this source.
- Then, tap the Back button and perform the installation.
- After the installation process is successful, please run the app.
How to Install Gcam Configs in Redmi 12
Optionally, you can try the config files provided below to maximize the photo results.
Download Configs File
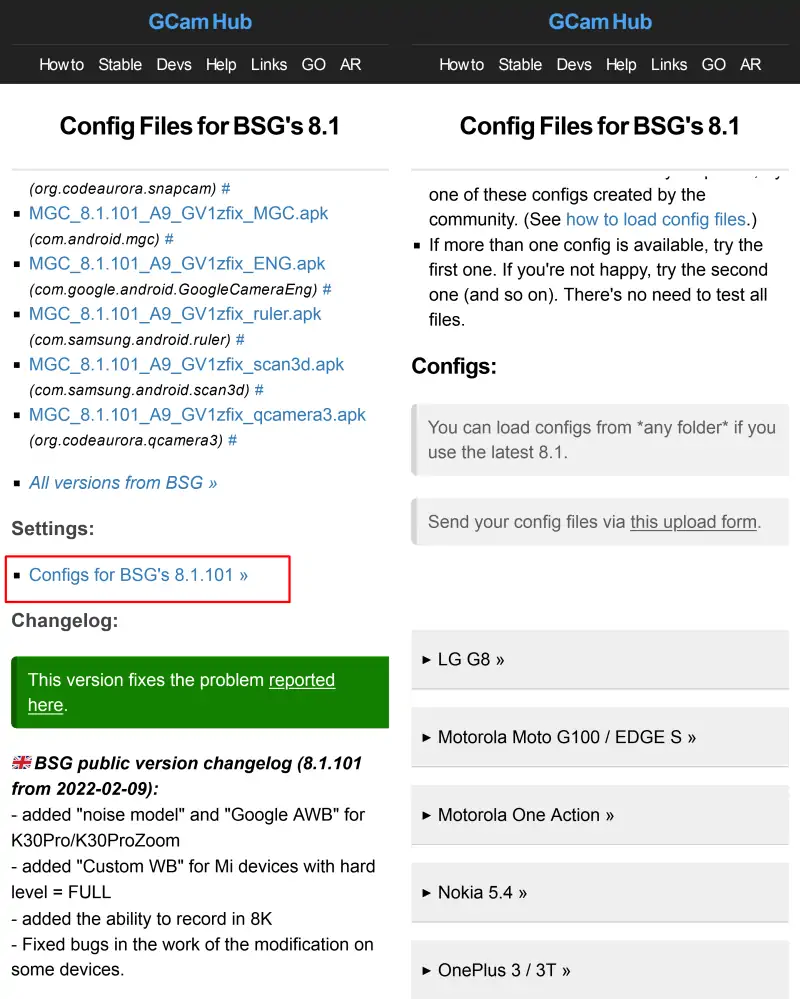
First you need to download the Configs file that matches the version of Gcam you are using. You can get it on the Gcam page that we have shared above then select Configs and then search and download the XML format file.
Configs for Gcam BSG’s 8.1
Go to Google Camera > Settings > Configs > Save and click to save. Next open the Files Manager app and go to Internal Storage. Select the Downloads folder then move the Configs file to the MGC.8.1.101_Configs folder.
Configs for Gcam LMC 8.4
Launch Google Camera > More Settings > Additional Settings > Configs Setting > Config Save. Open the My Files app and go to Internal Storage and move the Configs file in the LMC8.4 folder.
Restore Configs
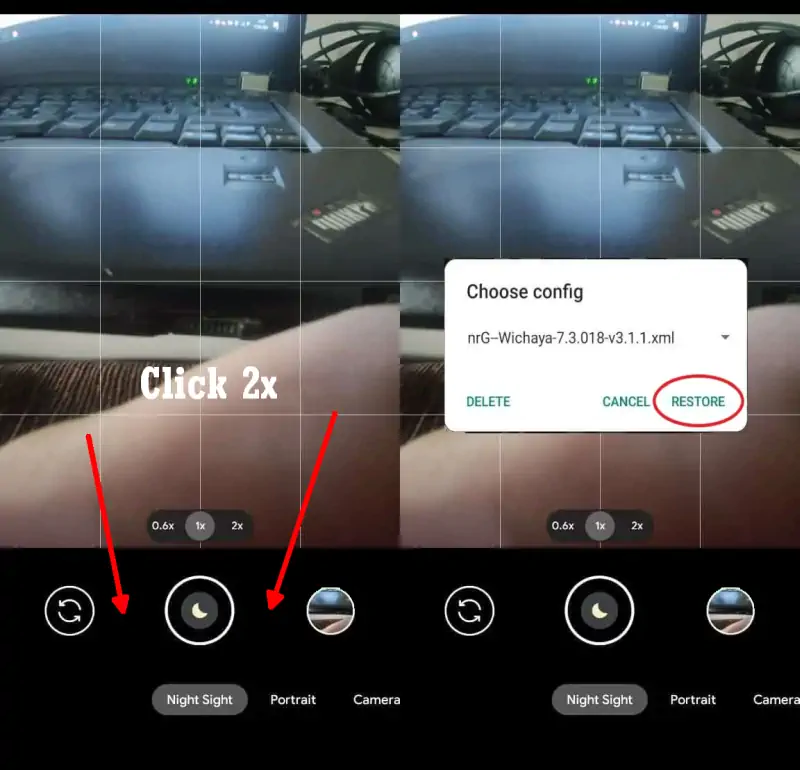
The next step is to open Gcam or Google Camera and tap 2x on the black area on the side of the Shutter button.
Now that the Google Camera app is installed on the Redmi 12, try taking any picture and compare the results with the stock camera.
If the photo results from Gcam are still inferior to the Xiaomi camera app, you can try another version of Gcam or use the Config XML file shared by the developer.
That’s the guide on how to download and install Google Camera port on Redmi 12. If you have a better camera app than Gcam that we shared above, please share the information in the comments.