Android IceCold Project, also known as AICP, found its way to the Nexus 6 thanks to XDA Recognized Developer LorD ClockaN. If you have a Nexus 6 sitting in a drawer, check out AICP 13.1 based on Android 8.1 Oreo for the device!
AICP are one of the popular custom ROMs. They are known for their stabilities with the latest Android source updates from Google. A Good share of developers work for this community. AICP ROMs are always up to date with regular OTAs. The community state AICP ROMs are battery friendly compared to other custom ROMs.
Before Getting Started:
Table of Contents
- Make sure the device is rooted before going forward for custom ROM installation.
- Installation of custom ROM requires clearing of memory in the smartphone, so make sure to back all the data by installing TWRP in the smartphone.
- Make sure your device has more than 60% battery, or else there is chance of smartphone getting temporarily bricked if the installation process is interrupted mid-way.
- Though installing custom ROM improve the device’s performance and UI experiences, it will void your warranty.
[alert-note]Warning:
Droidbeep.com will not be responsible for any kind of damage occurred to your Nexus 6 then go ahead and follow the given steps. during or after the installation of Android 8.1 Oreo AICP 13.1 custom ROM. Proceed at your own risk.[/alert-note]
Here’s a guide to install the AICP Android 8.1 Oreo ROM on your 6 (Shamu).
- Download Android 8.1 AICP custom ROM Nexus 6.
- Power off the phone and Wait a few seconds and then press the volume up and volume down buttons along with the power button at the same time for about 3, or 4 seconds.Release the buttons.
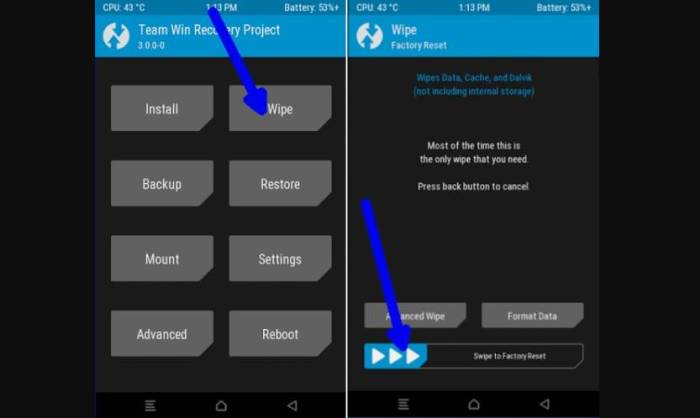
- Once the phone enters into TWRP Recovery, perform a full data wipe task by Select “Wipe” from the main menu of the TWRP recovery and then select “Swipe to factory reset” option on the bottom of the screen.

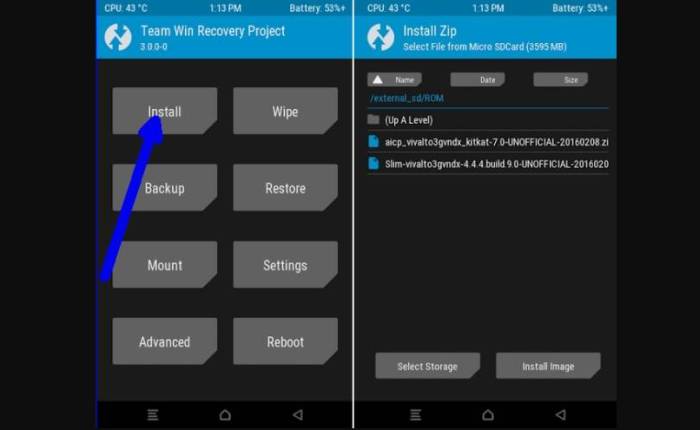
- Return to the main TWRP menu and choose Install. Browse and select the aicp_shamu_o-13.1-NIGHTLY-20180214.zip file which you copied earlier to your phone’s storage in the second step. Swipe to Install/Flash in order to begin the flashing process.

- Once AICP ROM are installed, and then select “Reboot System” button.
first boot takes a while so don’t worry if it takes longer than usual to boot. Subsequent boots will take just the normal amount of time. If you notice any bugs or wish to know more about the development of the ROM, visit the original XDA thread.