Has your Android phone ever experienced a bootloop, system error and total shutdown? If so, then you can solve the problem by connecting the Qualcomm USB Driver with your Android phone. To connect the Driver with an Android phone, you must first know how to install Qualcomm USB Driver.
Qualcomm USB Driver is a driver that can connect Android phones that use chipsets from Snapdragon with our PC or computer. As you already know, currently there are many brands of Android phones that already use the Qualcomm Snapdragon chipset. Examples of phones that use these chipsets are such as Lenovo, Xiaomi, Sony, and so on.
Installing Qualcomm USB Driver is also very easy for you to do quickly. Because we don’t need to have special skills to install this driver.
How to Install Qualcomm USB Driver
Table of Contents
If you have an Android phone that has problems such as bootloop, system error and even total shutdown, you can solve it by repairing it with a computer. But before you fix it, you must detect your Android on your computer or laptop.
You also can’t just connect your Android phone to your computer using a USB cable. Because to detect the chipset on the phone, you need a driver application that can detect the Qualcomm chipset on your Android phone.
Therefore, we need to install the USB Driver on our computer first. According to LaptopBeep, there are 2 ways to install USB drivers on a Windows PC or Laptop. The first way is manually and automatically.
Install Qualcomm USB Driver Automatically
To install Qualcomm USB Driver automatically, you must fulfill the two conditions below, namely:
First, you must disable the Windows Signature Driver on your computer.
Second, you must download the Qualcomm USB Driver.
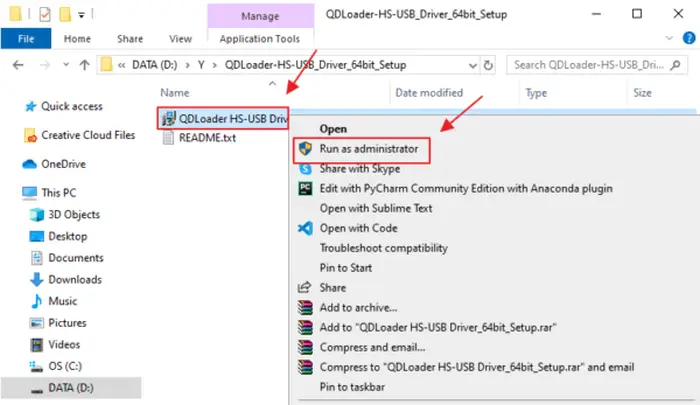
Step 1. If you have downloaded the Qualcomm driver, then you must extract the file first. If so, right-click on the .exe extension file. After that click the Run as administrator menu.
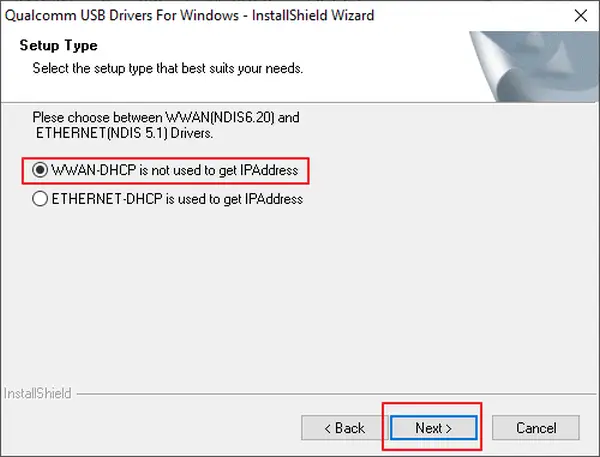
Step 2. Then select the setup type WWAN-DHCP is not used to get IPAddress. After that click Next.
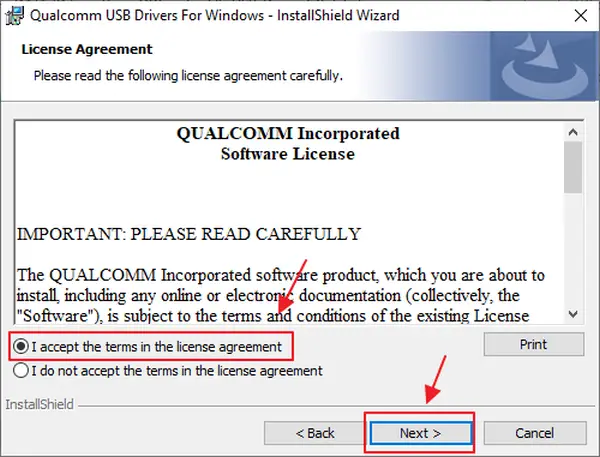
Step 3. In the License Agreement section, select the I accept the terms in the license agreement option. Then click the Next button.
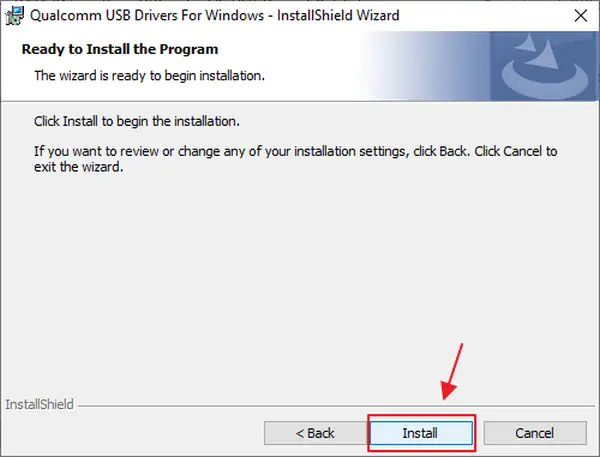
Step 4. Click Install and if you have finished installing then click Finish.
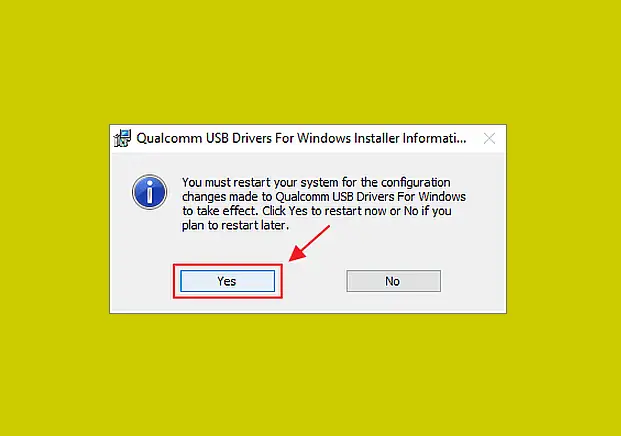
Step 5. To enable this Driver, you must restart your computer. Then click Yes on the window. Then wait until the computer finishes restarting.
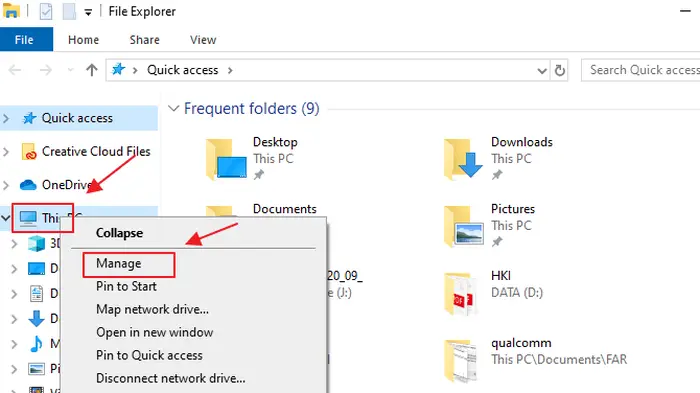
Step 6. Next, connect your Android phone to the computer using a USB cable. Then go to file explorer and right-click on your computer name. And choose the Manage menu.
Step 6. If you are done, then in the Device Manager section look for Ports (COM & LPT). Then you will see your android chipset detected in it.
Install Qualcomm USB Driver Manually
In this second way you also have to fulfill several conditions, namely:
- Download the Windows USB Driver file.
- Make your Android phone in EDL mode. To turn your phone into EDL mode, you can search for it first on Google, because each brand of phone has its own way.
Step 1. Go to Device Manager, then click on Ports (COM & LPT). Right-click on QUSB_BULK and select Update Driver Software…
Step 2. After that, select Browse my computer for driver Software. Then click on let me pick from a list of device drivers on my computer. Then click the Have Disk button.
Step 3. Previously, you must first extract the downloaded file. Then go to the folder. Click the browse button and enter the Qualcomm > Driver > folder and select the qcser.inf file.
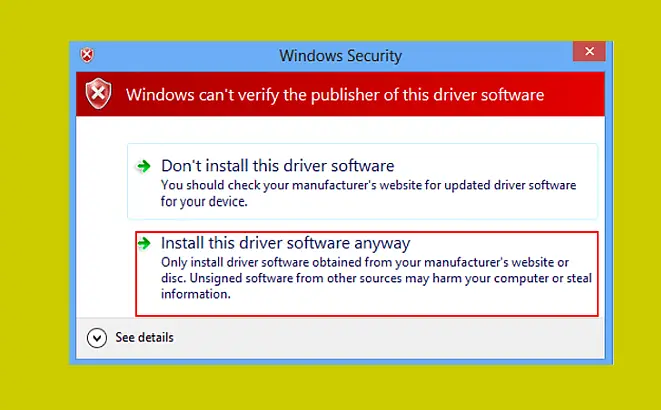
Step 4. After that, click the OK button and click Next. Maka akan muncul Windows Security. Klik Install this driver software anyway.
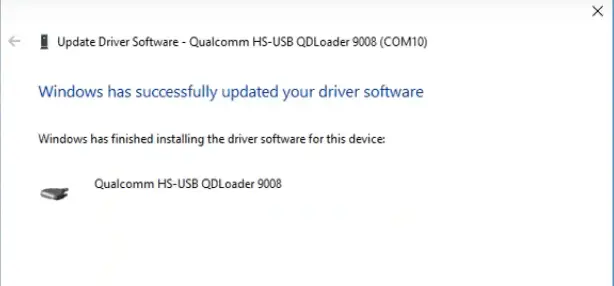
Now the Qualcomm driver is installed.
Thus the article that discusses how to install Qualcomm USB Dwiver on Android phones. Hopefully this article can help you to install Qualcomm drivers.

